Tracking Pages
Nudge tracks your view on per Screen basic. So in order to sent the tracked views to Nudge's Dashboard you need to follow the below steps
Connecting Your App
Add the Intent Filter
In order to open the App in Screenshot mode, You need to add the below snippet to the manifest.xml file of your app
<activity
    android:name="com.nudgenow.nudgecorev2.core.NudgePairActivity"
    android:exported="true"
    android:launchMode="singleInstance">
    <intent-filter>
        <action android:name="android.intent.action.VIEW" />
        <category android:name="android.intent.category.DEFAULT"/>
        <category android:name="android.intent.category.BROWSABLE" />
        <data android:scheme="nudge-{APP_SCHEME_ID}"
        android:host="nudgenow.com"
        android:pathPattern="/.*/.*" />
    </intent-filter>
</activity>

<provider
    android:name="androidx.core.content.FileProvider"
    android:authorities="{YOUR_APP_NAME}.fileprovider"
    android:exported="false"
    android:grantUriPermissions="true">
    <meta-data
        android:name="android.support.FILE_PROVIDER_PATHS"
        android:resource="@xml/file_paths" />
</provider>
Replace YOUR_APP_NAME with your package name. Example : com.example.appname
Capturing Screens
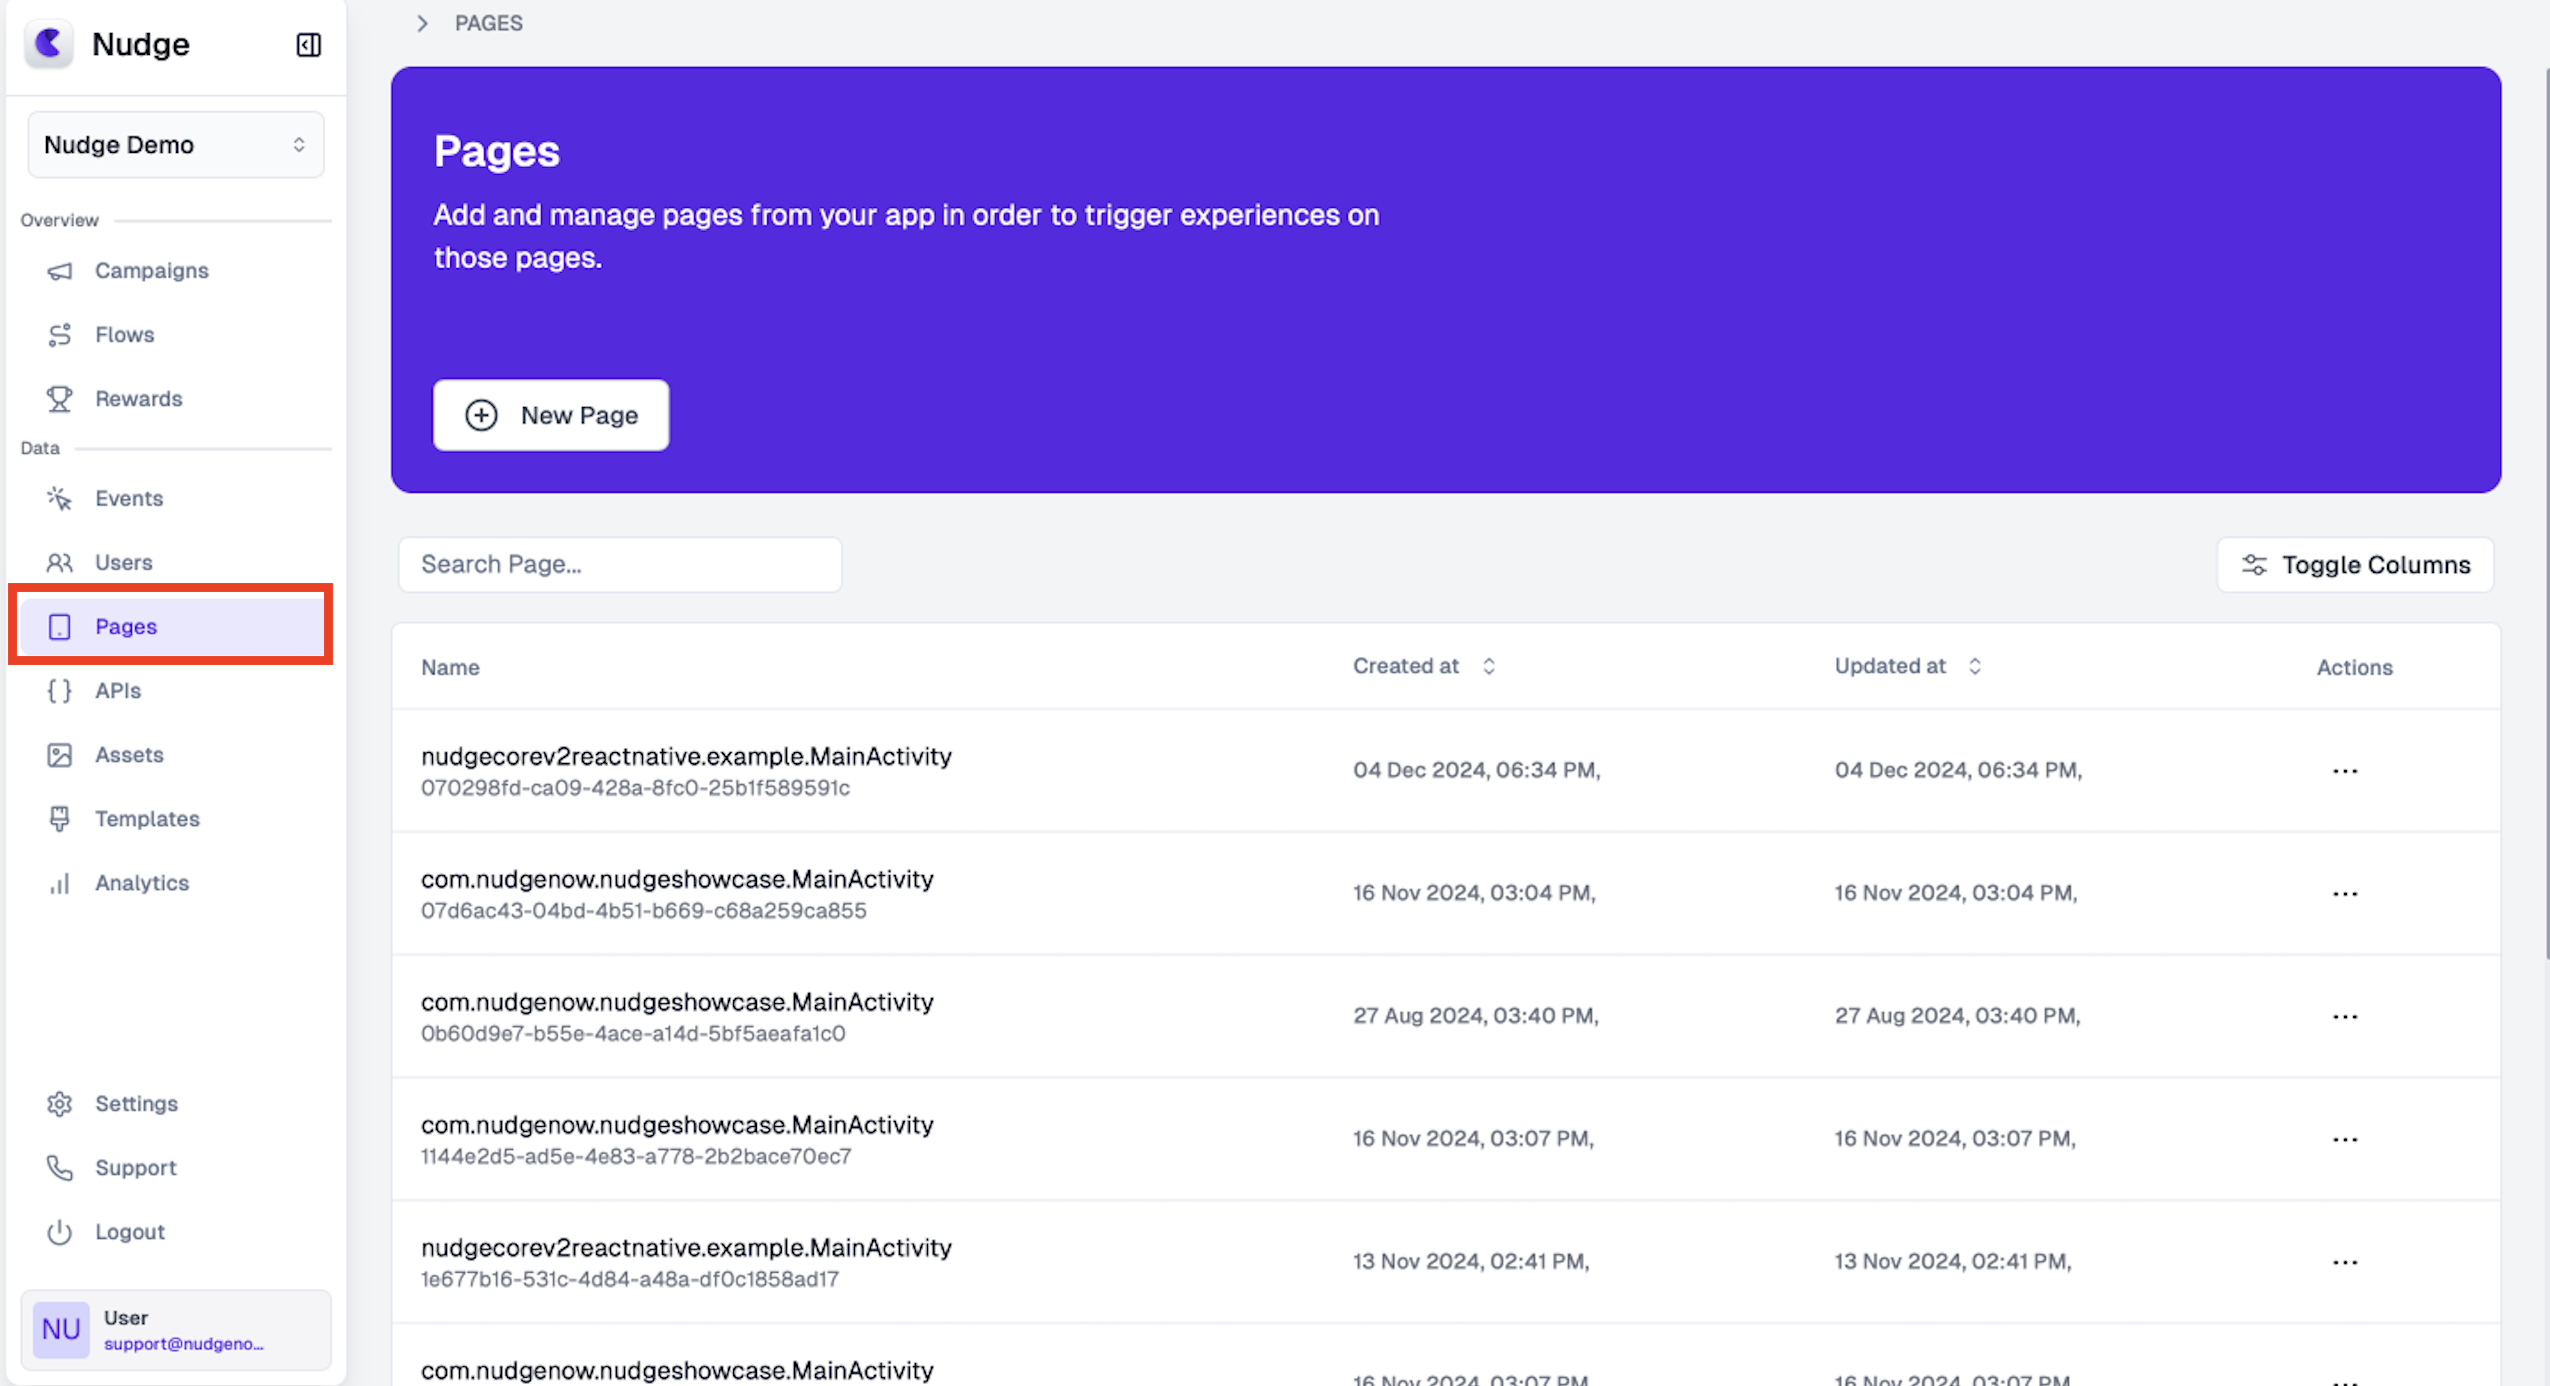
- Open the Nudge Dashboard and go to the Pages section in the sidebar.
-
Click
+ New Page. A popup window will appear. -
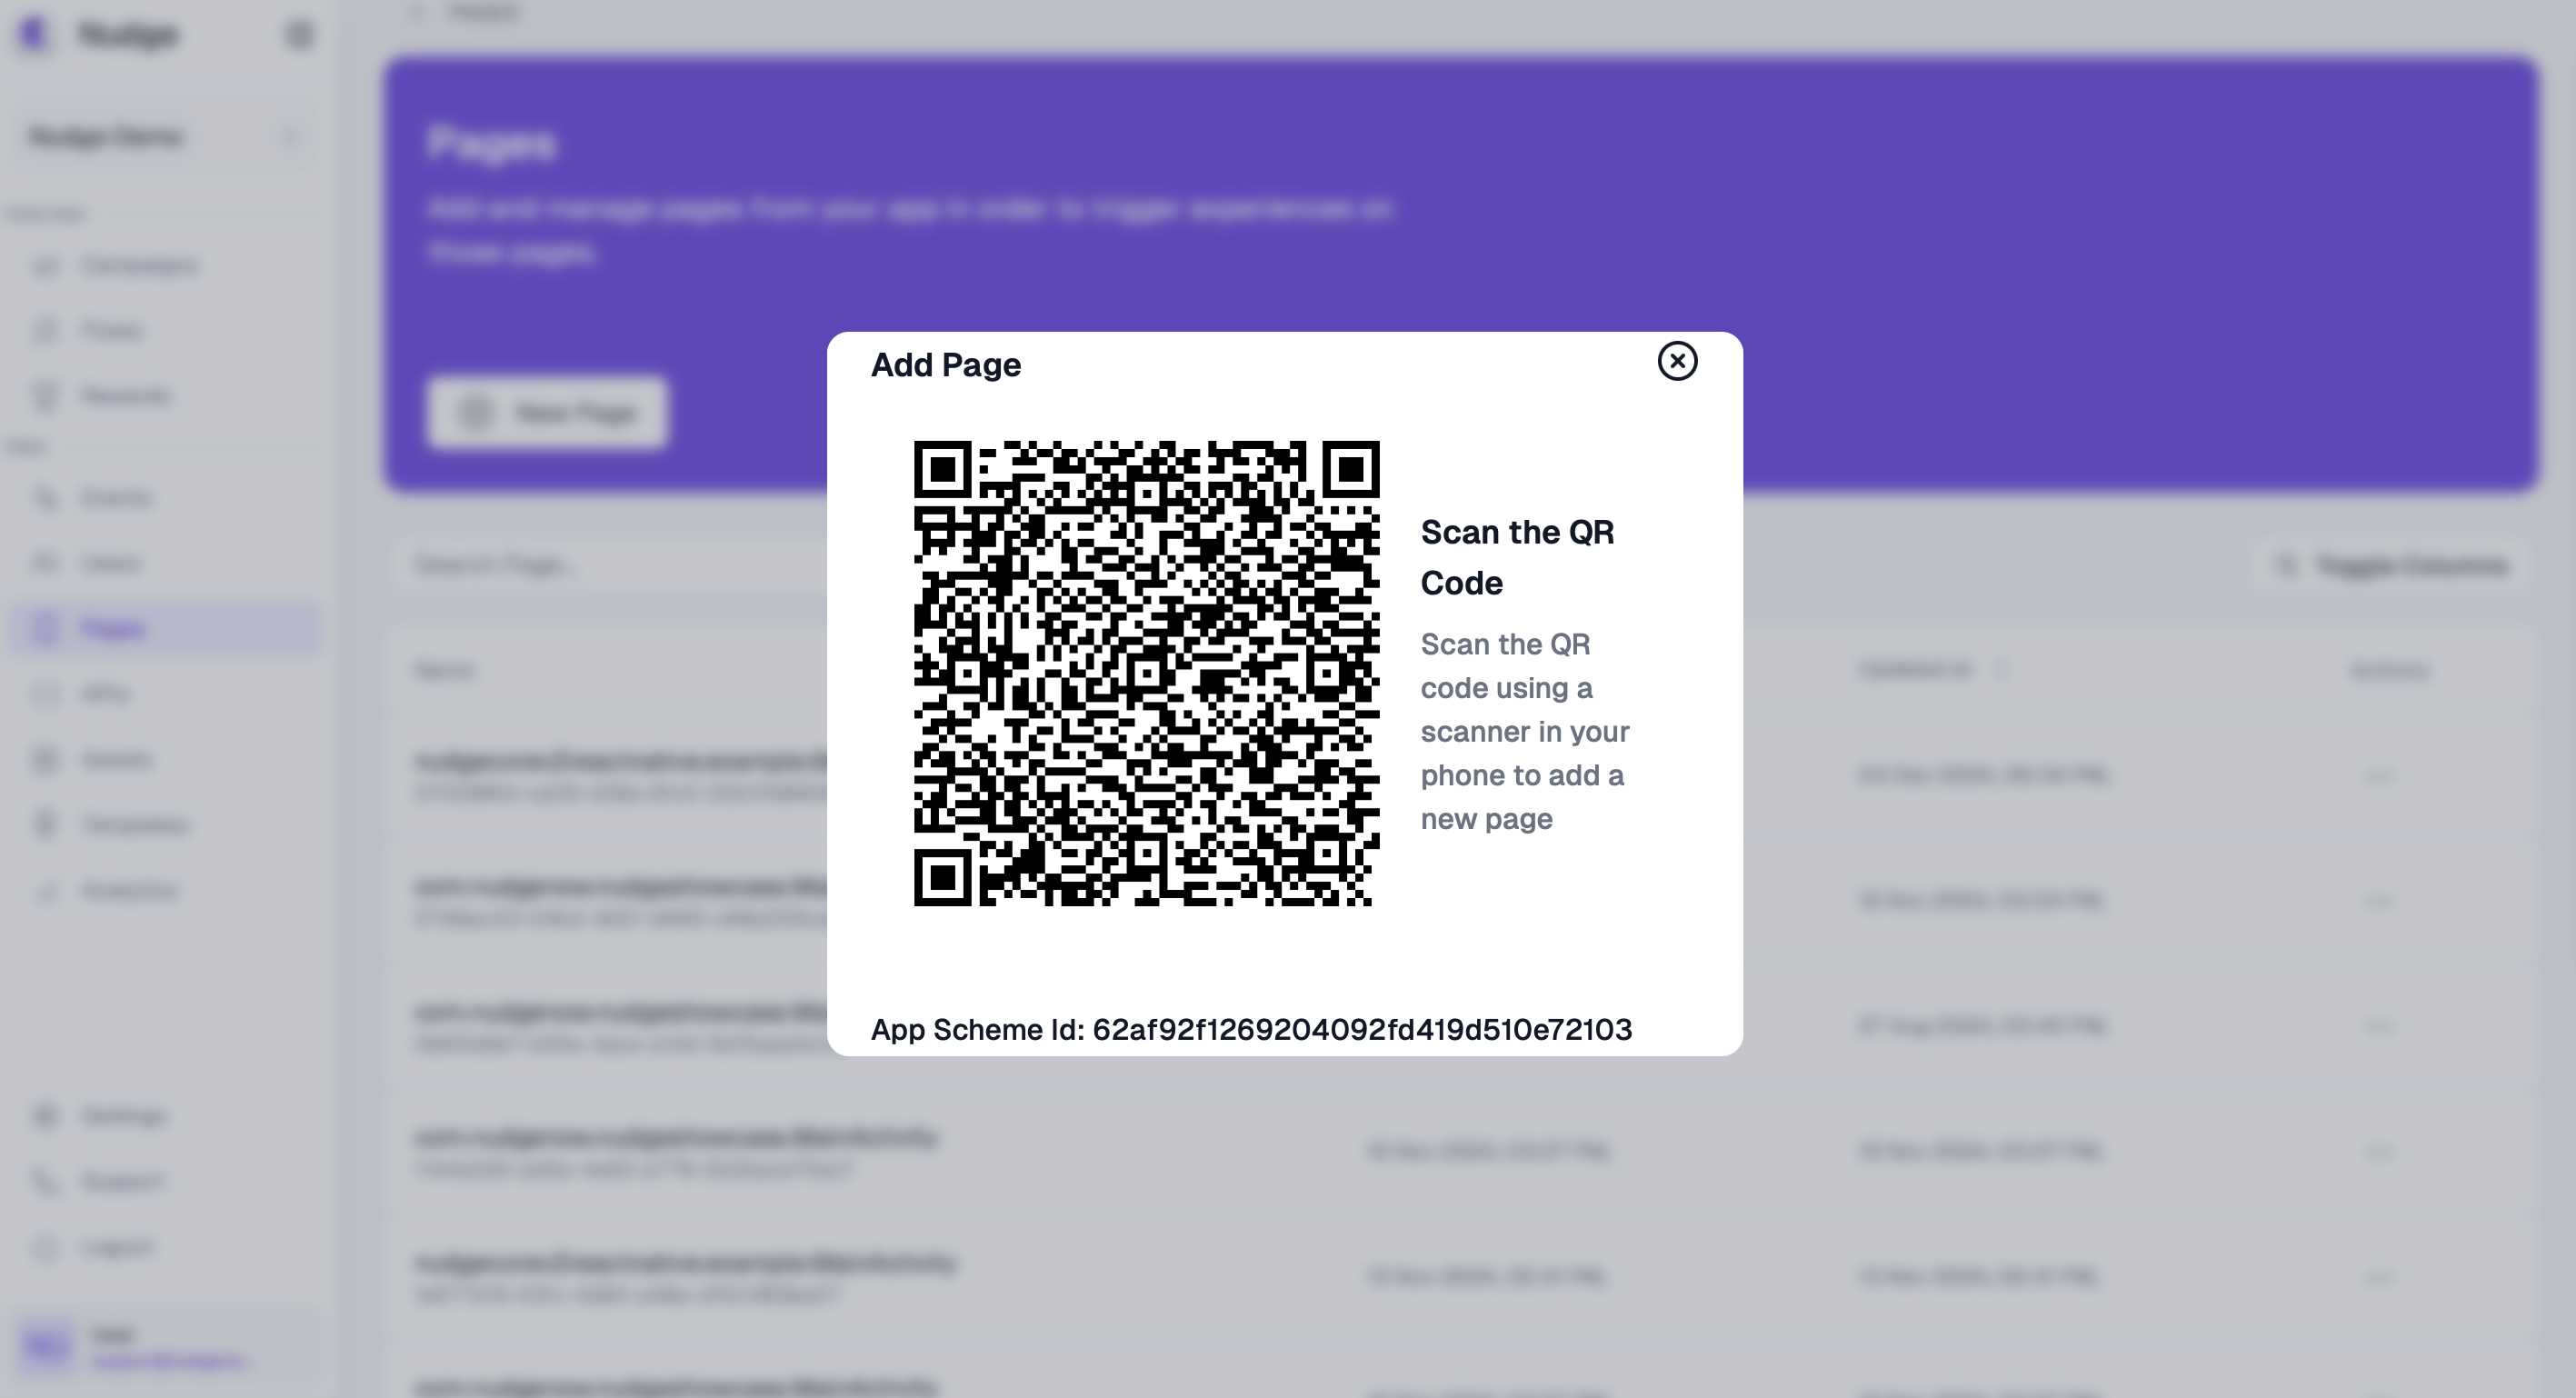
In the popup, you’ll see your
App Scheme Id. Add this{APP_SCHEME_ID}in yourAndroidManifest.xmlfile.
-
Scan the QR code shown in the popup using a mobile device that already has your app installed (with the updated manifest).
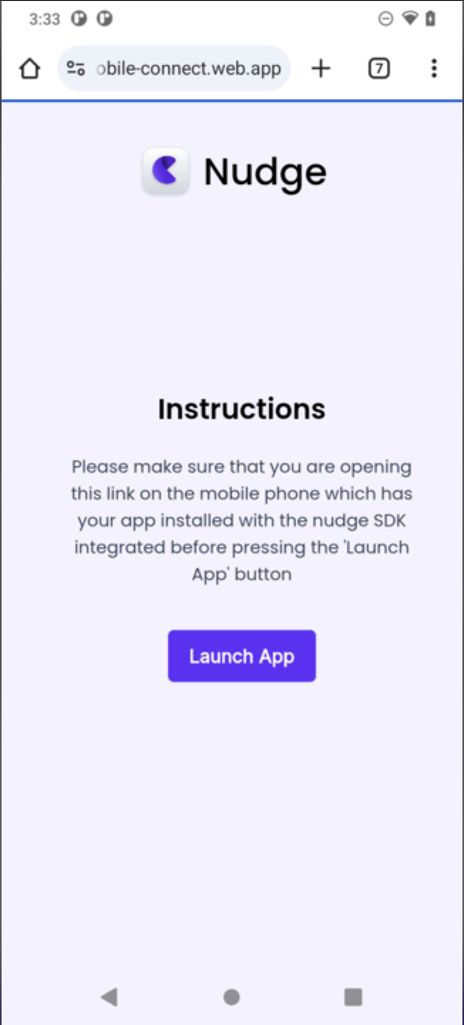
-
Open the generated URL, then tap “Launch App” to start your app in Screenshot Mode.
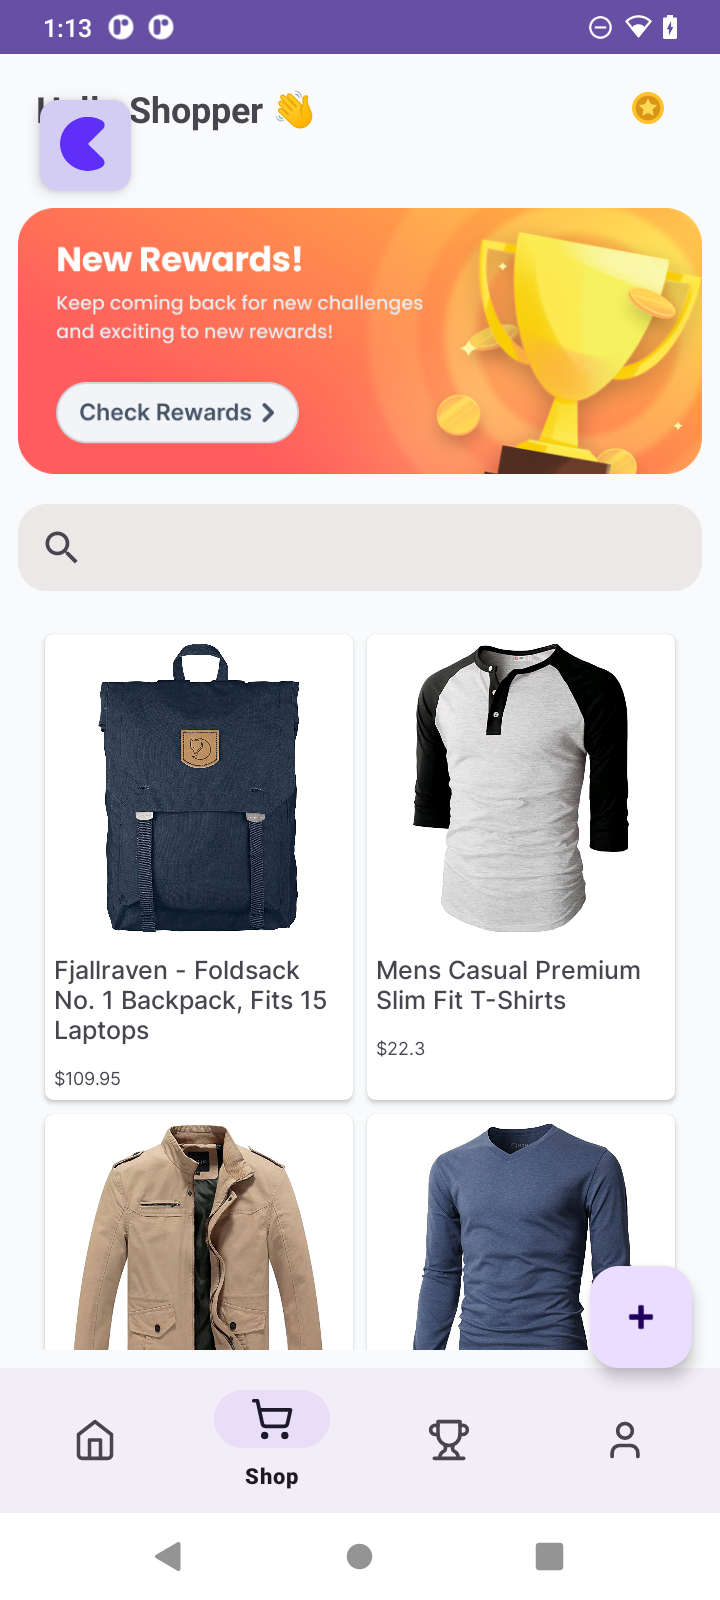
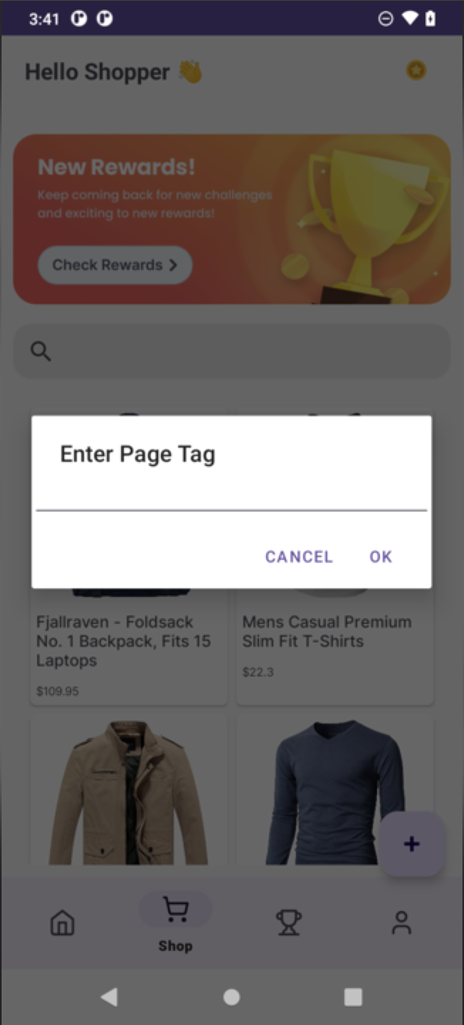
- In your app, you’ll see the Nudge logo at the top-left corner. Tap it to open a popup, then:
- Enter a name for the screen you want to capture.
- Tap “Save.” This sends all visible views to the Nudge Dashboard.
- Go back to the Nudge Dashboard in the Pages section and refresh. You’ll see your new screen and its tracked views.
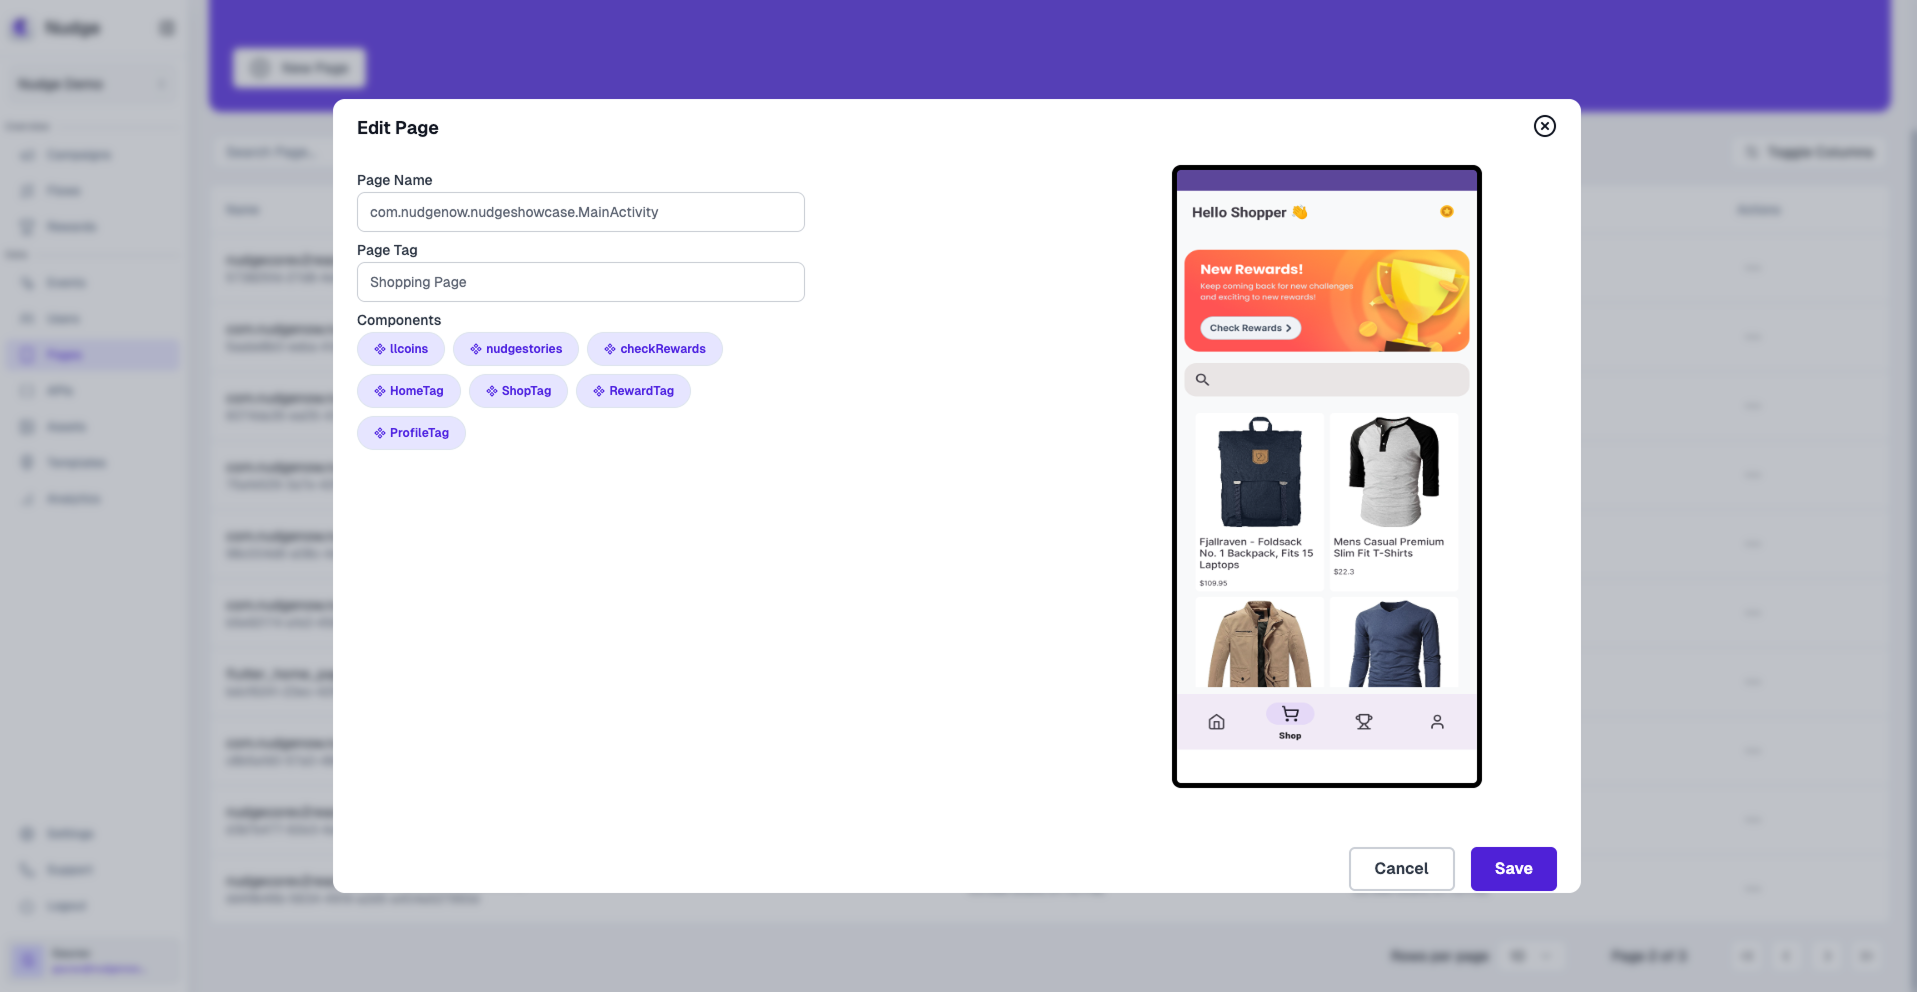
That’s it! You can repeat this process to capture any screen in your app and manage them in the Nudge Dashboard.